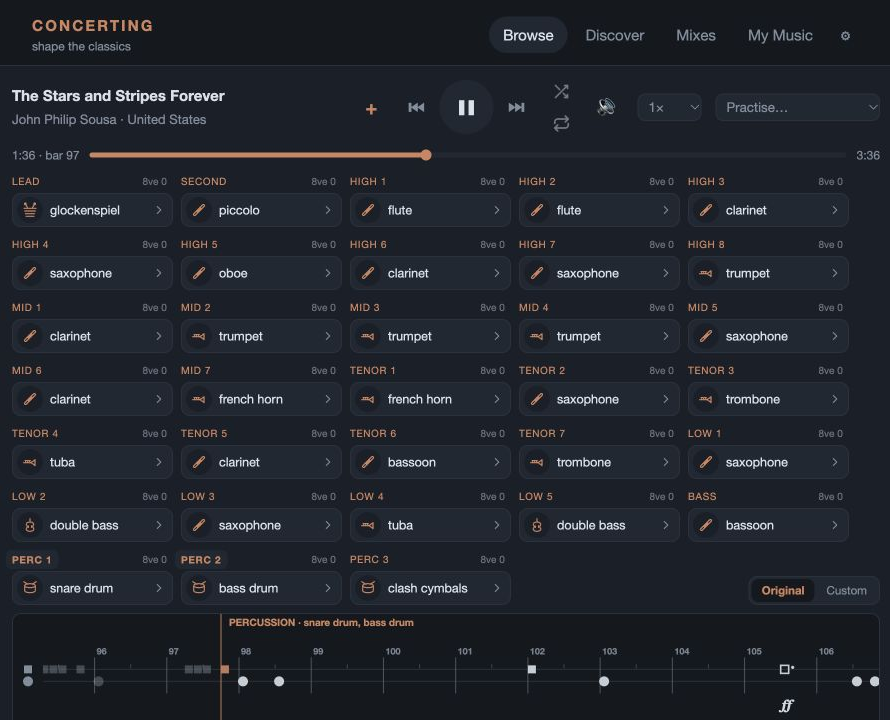
Let the other players accompany you. Give a tricky passage a little room. The Practice tools help you build confidence at your own pace.
Start with the main unlock guide if you’re new to the player. Practice tools add the controls for playing along with the ensemble.
01
Choose your part.
First, make a little space for yourself in the music. Switching on the tools and choosing your part are two separate steps.
Real app walkthrough
See the clicks, step by step.
English · tablet / computer · silent
Switch Practice tools on
Follow these steps
Practice tools is off.
Switch Practice tools on to reveal the practice settings.
Find it on your screen
Your practice controls in Now Playing
Select a control to highlight it.
01
Actual app screen · English
Choose your part
What to look for
Practise…No part selected
High · violin sectionA chosen part
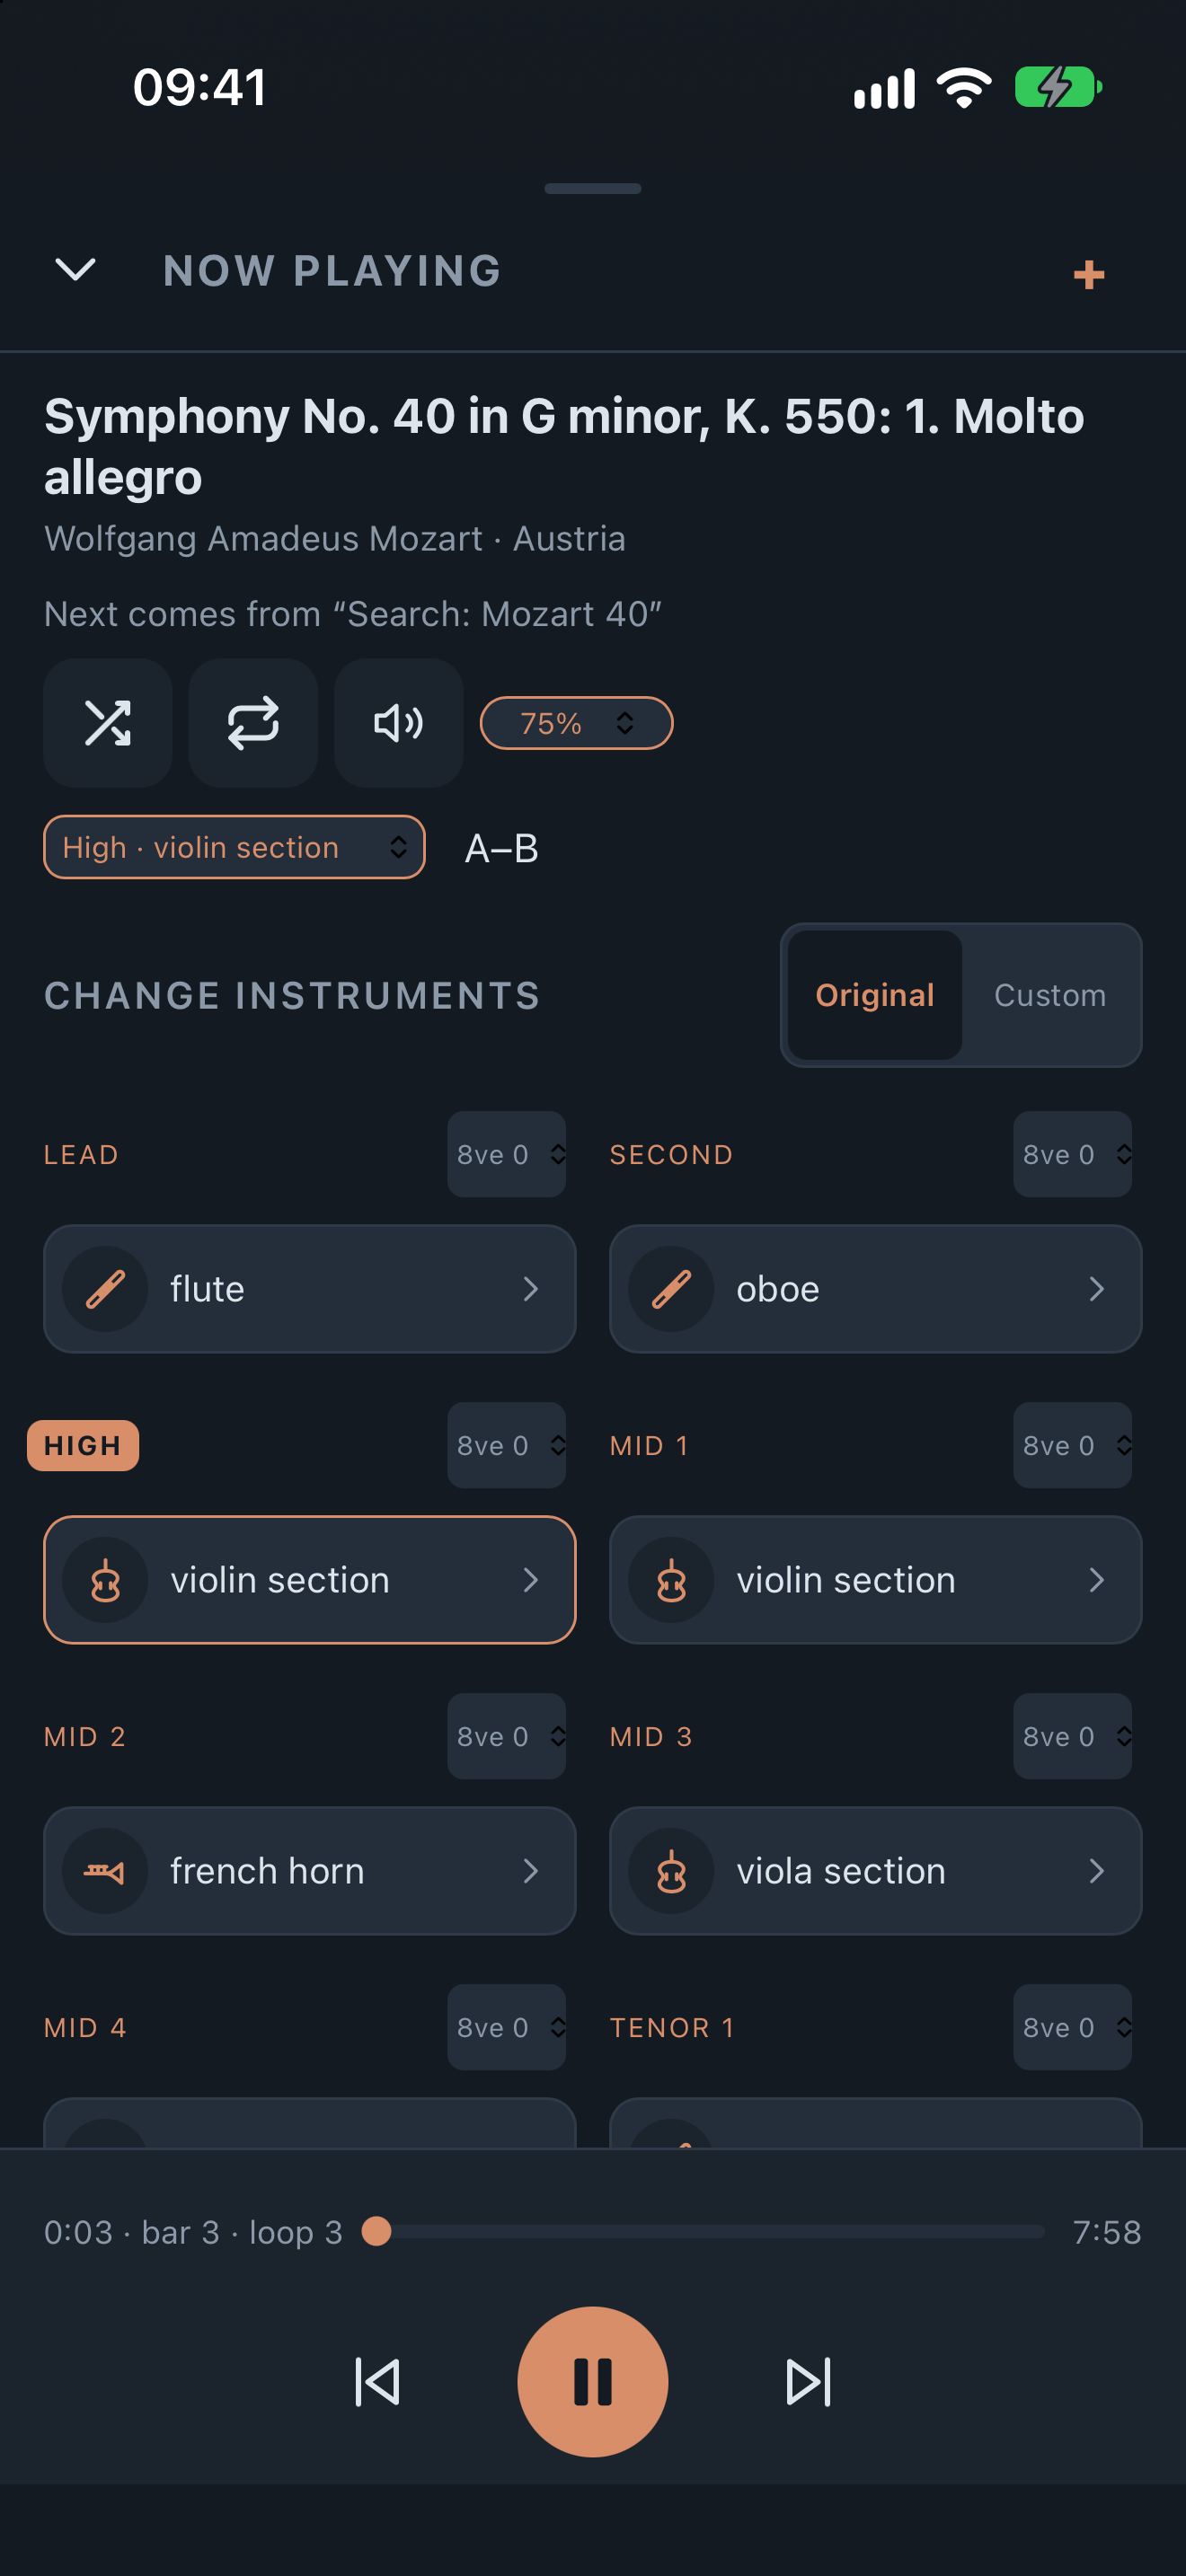
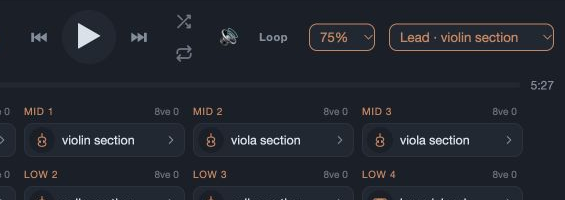
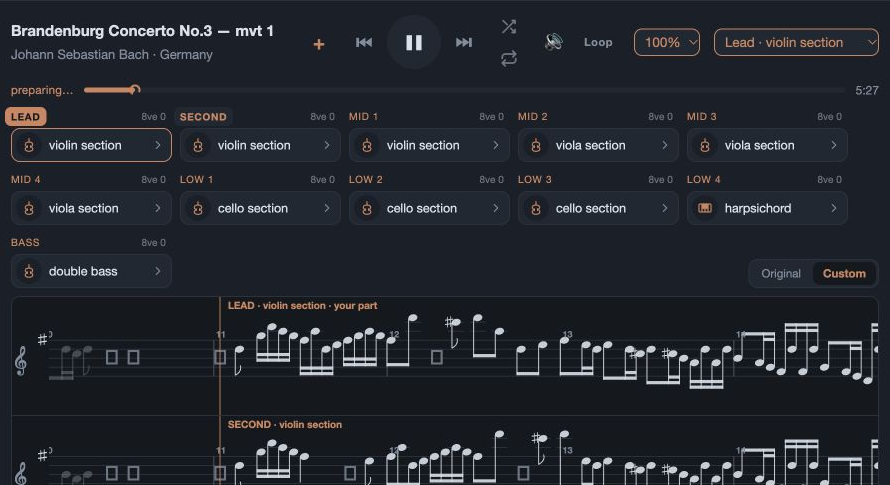
In this real screen, High · violin section has already been chosen. Its part name and instrument tile are highlighted below.
On a phone
With Practice tools enabled, open Now Playing. The part selector appears just below the Shuffle/Repeat row.
On a tablet or computer
The Practise… selector is in the player controls above the arrangement.
Practice tempo
What to look for
75%Practice tempo
Choose from 50% to 100%. Select your part first to see these choices.
On a phone
The speed selector to the right of the speaker now shows a percentage.
On a tablet or computer
The ordinary speed selector changes to the practice percentage.
Loop
What to look for
LoopNo loop
A…One end set
A–BBoth ends set
On a phone
The Loop button is beside the practice-part selector. This screen shows A–B because a passage is already marked.
On a tablet or computer
Loop sits in the player transport while a practice part is selected.
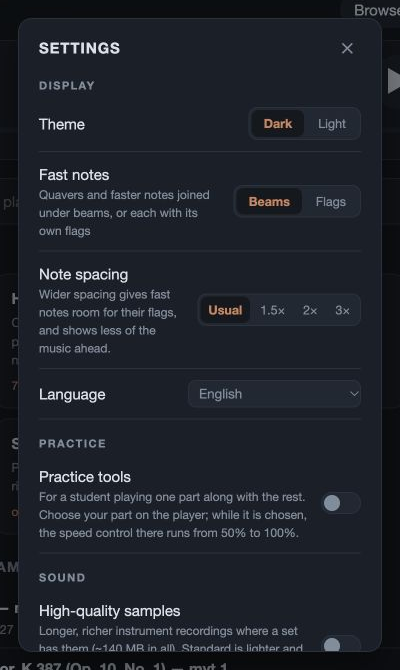
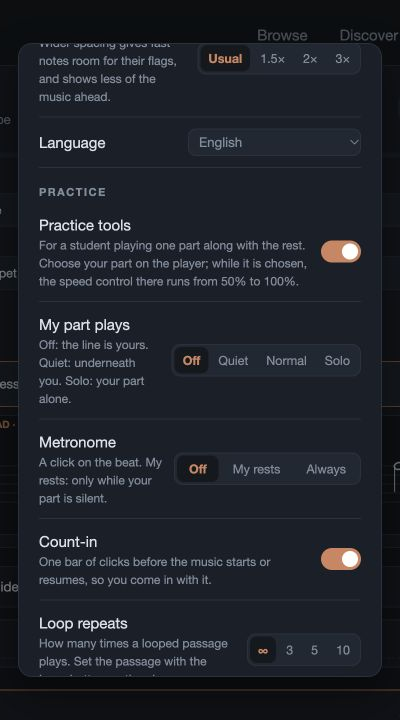
Open Settings → Practice and switch on Practice tools.
Start a piece, then use Practise… to choose the player you will play. On a phone, open Now Playing first.
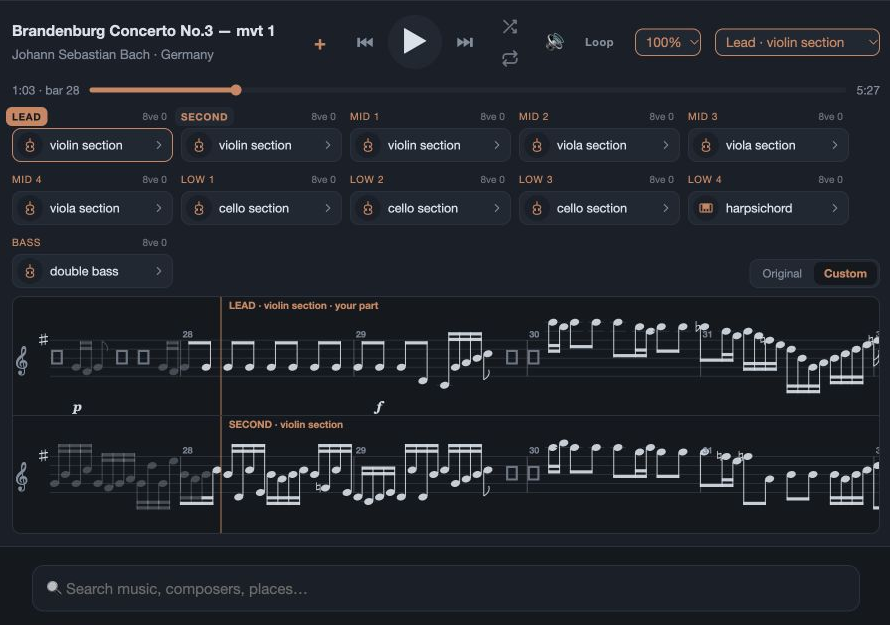
Turn your phone sideways to read the music. On a tablet or computer, your selected player’s bar opens automatically.
Your choice is remembered
Concerting remembers your practice part for each piece. A keyboardist’s grouped staves belong to one player.
Return to listening
Choose the blank Practise… option again to clear your practice part, or switch off Practice tools in Settings. Your usual listening arrangement is kept.
Selecting your part brings in the practice tempo and the My part plays setting. Initially these are 75% and Off, so it is normal for your selected line to become silent.
02
A guide, or a space for you.
In Settings → Practice, My part plays decides how much help you hear. Your music bar stays active even when the app leaves the sound of your part to you.
Real app walkthrough
See the clicks, step by step.
English · tablet / computer · silent
Choose how much of your part to hear
Follow these steps
Off leaves your line for you to play.
Quiet plays your part softly beneath you.
Normal plays your part at its usual level.
Solo lets you hear your chosen part on its own.
Return to Off when you are ready to supply the line yourself.
Choose what helps you
My part plays
One control, four ways to hear your chosen part. The ensemble means the other players.
Listening balance · illustration
Off
Your partSilent
EnsemblePlaying
The ensemble plays around you; you supply your own line. This is the initial setting.
Try this whenYou are ready to carry the line yourself.
Quiet
Your partSoft guide
EnsemblePlaying
Your line plays softly beneath you, like a reassuring guide.
Try this whenYou want a little help staying with your part.
Normal
Your partUsual level
EnsemblePlaying
Your line plays at its usual level with everyone else.
Try this whenYou want to hear how the whole arrangement fits together.
Solo
Your partUsual level
EnsembleSilent
Hear just your chosen player so you can learn the shape of the line.
Try this whenYou want to listen closely before playing along.
Watch the four choices in action+
Listen. Join in. Take the part.Illustration · no audio
Your partThe bar stays visible
EnsembleThe other players
OffQuietNormalSolo
Solo: hear only your chosen line to learn its shape.
01 / 04
Where to find these Practice settings+
Find it on your screen
Find your practice settings
Select a control to highlight it.
01
Actual app screen · English
My part plays
What to look for
OffYou supply the line
QuietSoft guide
NormalUsual level
SoloOnly your part
On a phone
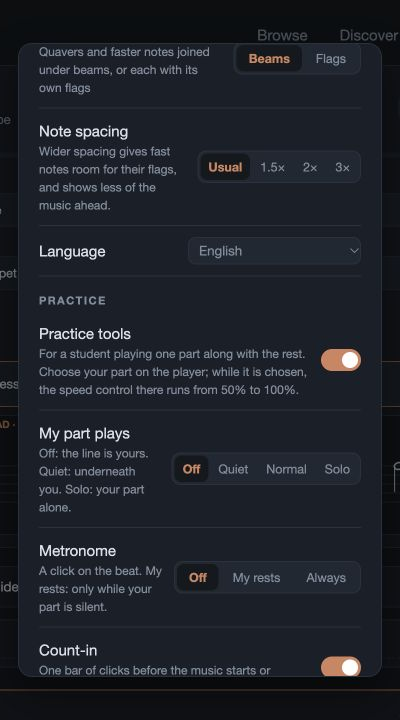
Close Now Playing and open Settings → Practice. My part plays is just below the Practice tools switch.
On a tablet or computer
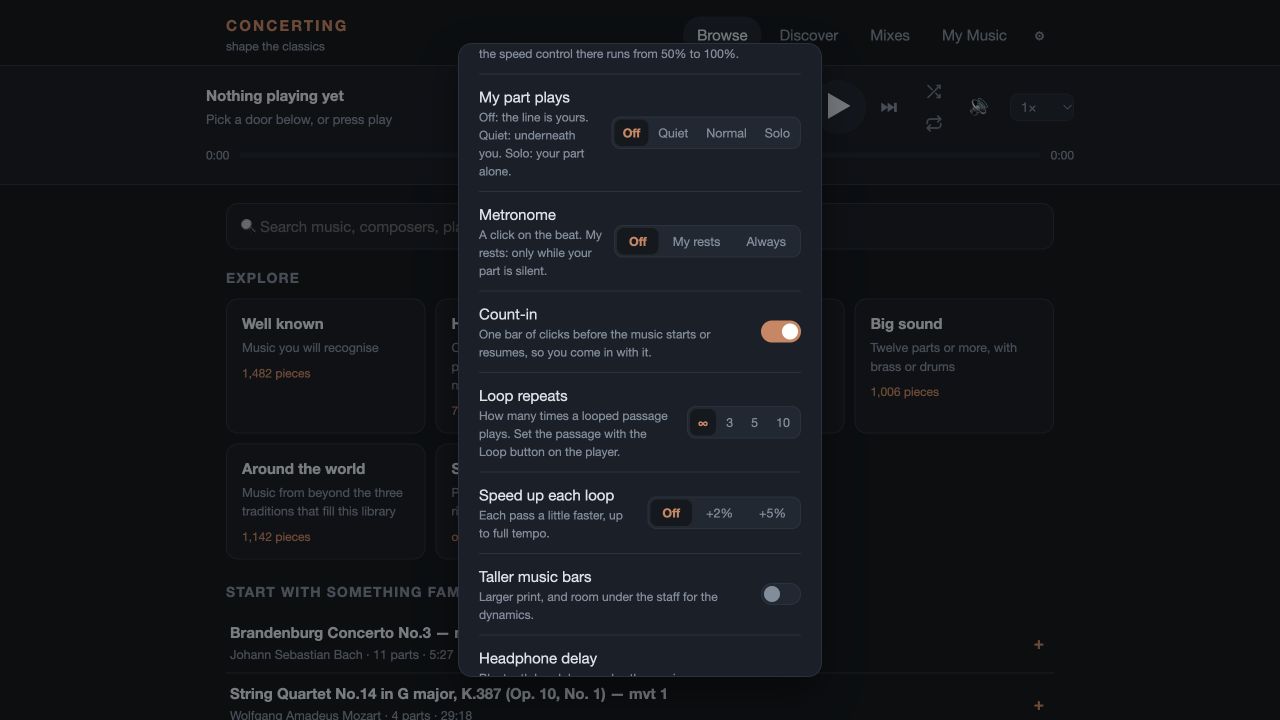
Open the cog and scroll to Practice, then My part plays.
Metronome
What to look for
OffNo click
My restsDuring rests
AlwaysThroughout
On a phone
In Settings → Practice, look directly below My part plays.
On a tablet or computer
Use the Metronome row in the same Practice section.
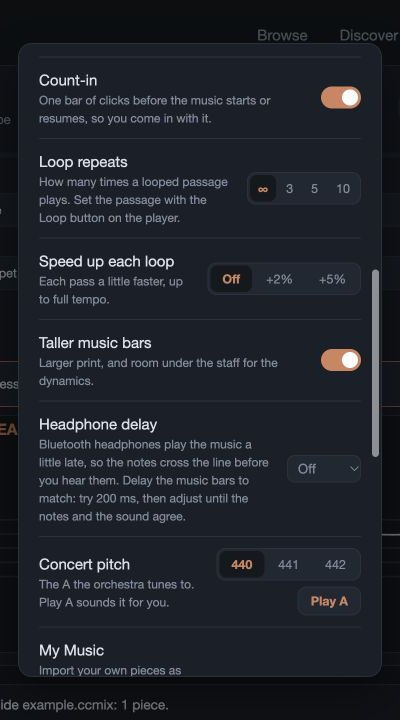
Count-in
What to look for
Count-in on
On a phone
The Count-in switch follows the Metronome row.
On a tablet or computer
Find Count-in between Metronome and Loop repeats.
Loop repeats
What to look for
∞Keep repeating
3Three passes
5Five passes
10Ten passes
On a phone
Find the four repeat choices beneath Count-in.
On a tablet or computer
Use the same row in Settings → Practice.
Speed up each loop
What to look for
OffSame speed
+2%Two points faster
+5%Five points faster
On a phone
This is the next row after Loop repeats.
On a tablet or computer
Find it just below the repeat-count choices.
If Solo is silent, check that the part has not also been muted in its instrument picker, and that the main speaker control is on. Practice level is separate from those mutes.
03
Find a comfortable pace.
Once you choose a practice part, the player’s speed control becomes a practice percentage. Take your time: the right pace is one that lets you play the phrase comfortably.
Real app walkthrough
See the clicks, step by step.
English · tablet / computer · silent · Selection and result shown
Choose a comfortable practice tempo
Follow these steps
With a part selected, open the percentage list.
Choose a practice pace, such as 60%.
60% gives the phrase more time.
100% returns to the written practice tempo.
50%–100%
Choose in 5% steps. 50% is half the written tempo; 100% is the piece’s full tempo. The initial practice pace is 75%.
Separate from listening
Practice tempo does not overwrite the listening speed saved with a Mix. Clear your practice part to return to the normal 0.8×–2× listening choices.
04
Give a phrase another turn.
Use Loop to stay with a small passage. Mark the two ends where you want them: the app uses those exact positions, without snapping them to a beat or bar.
Real app walkthrough
See the clicks, step by step.
English · tablet / computer · silent
Mark a passage and release the loop
Follow these steps
Press Loop at the first end of your passage.
A… means the first end is marked. Move to the other end.
Press A… to mark the other end.
A–B shows that the loop is set. Press again to clear it.
Loop returns to its unmarked state.
At one end of the passage, press Loop. The control changes to A….
Move to the other end and press again. A–B is now active; the ends can be marked in either order.
Press a third time to release the loop. Choosing another piece also clears it.
Loop repeats
Choose ∞, 3, 5 or 10 in Settings → Practice. These are total passes: with 3, you hear the passage three times, then the music continues beyond B.
Speed up each loop
Choose Off, +2% or +5%. Each return adds 2 or 5 percentage points of the written tempo, up to 100%.
Count-in at the return
With Count-in enabled and score timing available, you get preparation before each return to the passage.
For this practice session
Loop points are not saved into a Mix. Mark them again when you return to the piece.
A phrase, three comfortable passesIllustration · no audio
A…60%Three total passes · +5%
♪♩♫♩♪♩
AB
Press Loop at the first end. The control changes to A….
01 / 04
05
Know when to come in.
A few quiet cues can make a long rest much less daunting. Choose a practice part first. These tools use the timing in the score; imported MIDI does not provide that score grid.
Real app walkthrough
See the clicks, step by step.
English · tablet / computer · silent
Choose when the metronome clicks
Follow these steps
Off leaves the metronome silent.
My rests gives you a beat only while your part is silent.
Always keeps a click throughout.
Choose Off to stop the metronome.
Choose what helps you
Metronome
Choose when you would like a click. These examples show a rest followed by the notes in your part.
When the click plays · illustration
Off
Your rest
Your notes
No click. Choose this when the ensemble already gives you the pulse you need.
My rests
Your rest
Your notes
The click helps while your part has no sounding note, then stops as your line comes in.
Always
Your rest
Your notes
A click follows the piece throughout. The first beat has a stronger, higher sound.
Count-in
On by default. Prepares you when starting or resuming, seeking and returning to a loop. Usually one bar; two when a bar has fewer than three beats.
The long-rest countdown starts for rests of at least two bars in your selected engraved pitched part. Percussion uses its own bar and does not show this countdown.
06
Read the notes you expect.
Practice tools add bar numbers, available dynamics and crescendo or diminuendo marks. Your selected line is labelled “your part”. For transposing instruments, Written for helps the notes match the instrument in your hands.
Real app walkthrough
See the clicks, step by step.
English · tablet / computer · silent · Selection and result shown
Read a clarinet part in written pitch
Follow these steps
Open your selected player’s instrument tile.
Choose clarinet for the part you will play.
Written for now offers versions of clarinet.
Choose Concert pitch to compare the notation.
The selected bar is now written at concert pitch.
Choose B♭ clarinet again for that instrument’s written part.
Set the line’s playback instrument to the instrument you will use, then choose that player in Practise….
If the instrument transposes, use Written for below the practice controls to choose its version.
Read your selected engraved bar in that instrument’s written pitch. The music still sounds at concert pitch; the other players’ bars stay in concert pitch.
Clarinet & trumpet
Clarinet offers B♭, A, E♭ or Concert pitch. Trumpet offers B♭, C, D, E♭ or Concert pitch.
Horn & saxophone
French horn offers F or Concert pitch. The saxophone choice is B♭ tenor saxophone or Concert pitch.
Octave-transposing instruments
Guitars, double bass and bass guitars read an octave above their sound; piccolo reads an octave below. Concert pitch is also available.
Comfortable reading
Taller music bars is available on tablet and computer. Note spacing and Fast notes are under Display for everyone; they do not require Practice tools.
A clarinet line, written for youIllustration · no audio
Written for · Concert pitch
C
Sounds C throughout
In concert pitch, this example sounds C. The other ensemble bars stay in concert pitch.
01 / 03
Written for changes notation, not the sound or the saved Mix. The choice is remembered for that instrument family. It applies to engraved notation, not the plain staff of a MIDI import. Printed bar numbers can differ from the clock’s played-bar count after repeats. Marks appear where the score supplies them; there is no manual clef, note-name or fingering switch.
07
Take the rhythm part.
Percussion keeps its own way of showing the music. One untuned instrument uses a one-line bar. When several are followed, a kit bar gives the instruments their own lines and a pictogram legend.
Real app walkthrough
See the clicks, step by step.
English · tablet / computer · silent · Selection and result shown
Choose a percussion part to practise
Follow these steps
Open Practise… for this percussion piece.
Perc 1 is selected as your practice player.
In the shared kit, your own line stays prominent while the other part is lighter.
Choose the percussion player in Practise…. You can exchange its sound for another untuned percussion instrument in its picker.
On a phone, turn sideways: untuned percussion is grouped automatically. On a tablet or computer, follow two or more percussion players to see the shared kit bar.
Your practice part stays prominent while the other kit lines become lighter. Use the same Off, Quiet, Normal and Solo choices to decide what you hear.
Follow the passage
Where the score provides timing and notation, bar numbers, dynamics and loop highlights help you place each entry.
Keep instrument families in mind
Untuned percussion changes within its own instrument bank. Timpani and mallet instruments are pitched and stay with the melodic choices.
08
Get comfortable before you play.
These settings solve two different things: Concert pitch tunes the ensemble, while Headphone delay lines up the moving notes with the sound you hear.
Real app walkthrough
See the clicks, step by step.
English · tablet / computer · silent
Choose a tuning reference
Follow these steps
Choose 442 Hz when that is the pitch your group uses.
Press Play A to hear the selected tuning note.
Play A sounds the reference note. This GIF has no audio.
Return to 440 Hz for the usual reference.
Find it on your screen
Tune and line up the sound
Select a control to highlight it.
01
Actual app screen · English
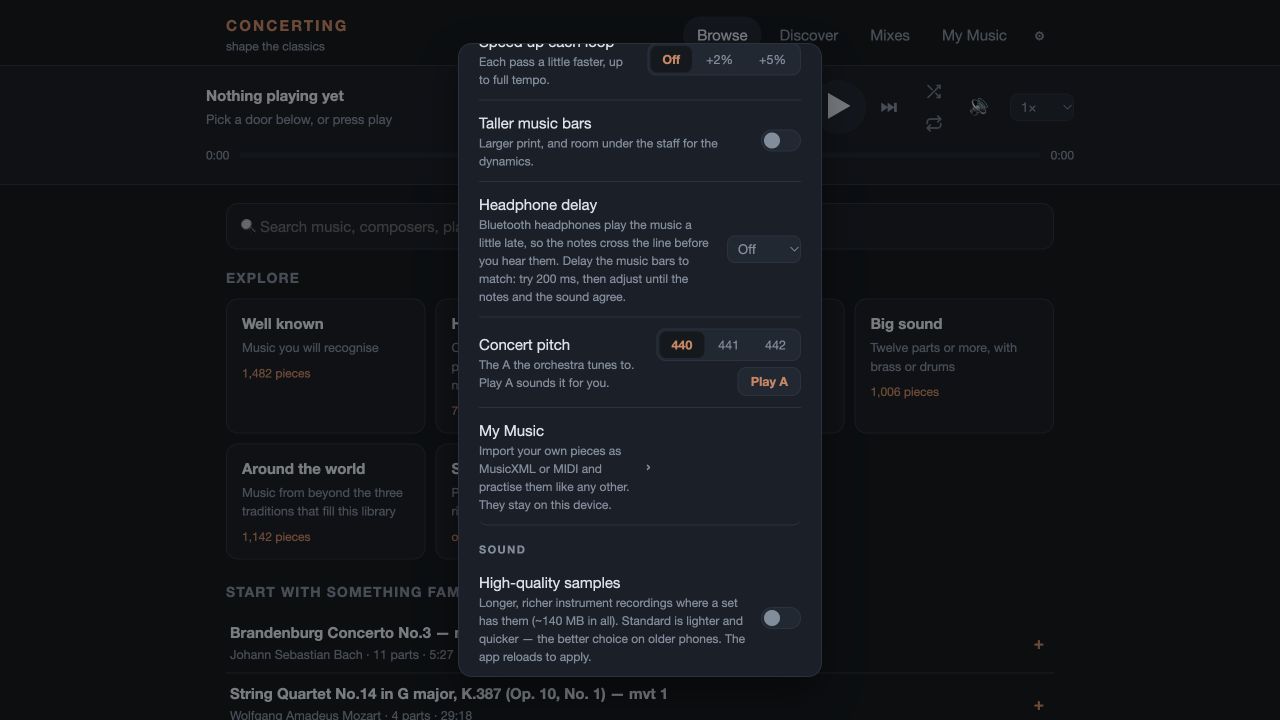
Headphone delay
What to look for
200 msAn example correction
On a phone
Open Settings → Practice and scroll below the loop settings to Headphone delay.
On a tablet or computer
It follows Taller music bars in the Practice section.
Concert pitch
What to look for
440A = 440 Hz
441A = 441 Hz
442A = 442 Hz
On a phone
The tuning choices are immediately below Headphone delay.
On a tablet or computer
Choose 440, 441 or 442 in the Concert pitch row.
Play A
What to look for
Play AReference tone
On a phone
Use the small Play A button beneath the three tuning values.
On a tablet or computer
It is below the 440/441/442 choices.
My Music
What to look for
My Music
On a phone
The My Music row sits below the tuning controls. Press it to open your imported pieces.
On a tablet or computer
Use this Settings row, or the My Music tab once Practice tools is enabled.
Concert pitch
In Settings → Practice, choose A = 440, 441 or 442 Hz. The initial value is 440. This tuning applies while Practice tools are switched on.
Play A
Sounds a short reference A at your chosen frequency. You can use it before starting a piece and tune your instrument by ear.
Headphone delay
If Bluetooth audio arrives after a note crosses the line, try 200 ms and adjust. The setting moves the visual bars behind the clock; it does not delay the audio.
Delay choices
Off; 50–250 ms in 25 ms steps; then 300, 350, 400 or 500 ms. This correction applies while Practice tools are on.
Taller music bars
On tablet and computer, switch this on for larger print and more room for dynamics. Phones already use the full sideways screen. The taller layout can remain when Practice tools is switched off.
Play A is a reference tone. Concerting does not listen to a microphone, judge your playing or award a score.
09
Bring your lesson with you.
My Music lets you practise pieces from your own files. MusicXML is the best starting point when you want to read the written score as well as hear the notes.
Real app walkthrough
See the clicks, step by step.
English · tablet / computer · silent
Import your own MusicXML score
Follow these steps
Press Import music and choose your MusicXML file.
The import summary confirms that the score is ready.
The MusicXML example keeps its written notes and dynamics.
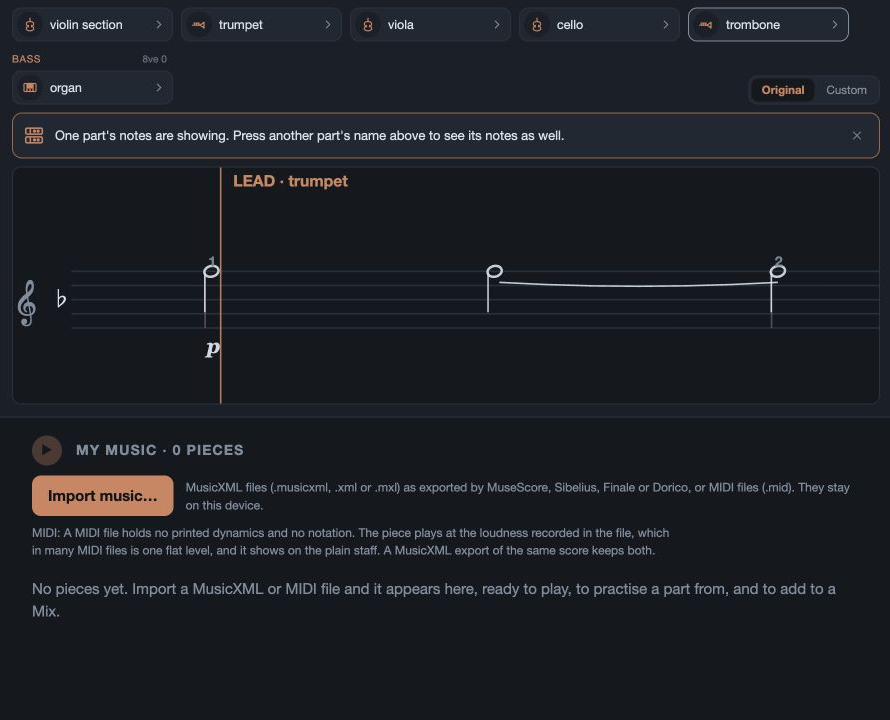
With Practice tools on, open Settings → Practice → My Music, or the My Music tab. Choose Import music….
Select one or more MusicXML or MIDI files. Export one of those formats from your notation program first if needed.
Read the import notice: it tells you what was understood or left out. Then play the piece, choose your part and practise as usual.
MusicXML
Accepts .musicxml, .xml and compressed .mxl. It can preserve written note values, keys, clefs and printed dynamics.
MIDI
Accepts .mid, .midi, .kar and .rmi. It carries performance notes rather than an engraved score. You can choose your part, slow it, change its level and loop a passage.
What MIDI cannot supply
MIDI imports have no engraved score or score beat grid here, so they do not supply the metronome, count-in, printed dynamics, score bar numbers, rest countdown or Written for notation.
On this device
Imported music stays on your device and can join a local Mix. It is not uploaded, and My Music entries are omitted when you share or export a Mix.
Replace or remove
Importing the identical file replaces its existing entry; a changed file appears alongside it. Use Remove on a My Music row to delete that piece from the device.
Keep listening
Files already imported still play with Practice tools switched off. Switch the tools back on to import more.
PDF scores and MP3 recordings are not music imports. Some files contain unsupported notation or incomplete information; the import notice is your best guide to what this particular file can do.